
🟢 How to send bulk messages in WhatsApp
Learn how to send a message to a large list of contacts in just a couple of clicks.
Sending messages to multiple recipients at a time can be a very useful tool to enhance your campaigns and boost engagement. However, avoid sending messages to numbers you haven't spoken to before, as this could result in the blocking of your WhatsApp account for violating Meta's anti-spam policies. It is recommended to use this tool cautiously and only send messages to contacts you have interacted with previously, with significant time intervals between each message.
With that said, here are the steps to do it:
I. Create a list of contacts
Log into your account.
Go to the WhatsApp section on the left sidebar and once inside, click on 'Contacts'.

Create a new list of contacts by clicking on the 'Add New' button.

Give it a name, select the 'Enable' status and tap on 'Submit' to save.

Back on the Contacts panel, go to the list you created and click on the 'Phone List' button.

Now you have two options to import your contacts.
To import them from a CSV file, click on 'Upload CSV'. Make sure the data inside has the required format, you can download the example template as a guide.

To upload them manually, select 'Via Form' and write the list of numbers, one per line. Make sure to use the accepted formats. When you are done, click on 'Submit'.

II. Create your bulk campaign
Go to 'Bulk Messaging' on the left sidebar inside the WhatsApp section.

Click on the 'Add New' button to create a new campaign.

Select a WhatsApp profile.

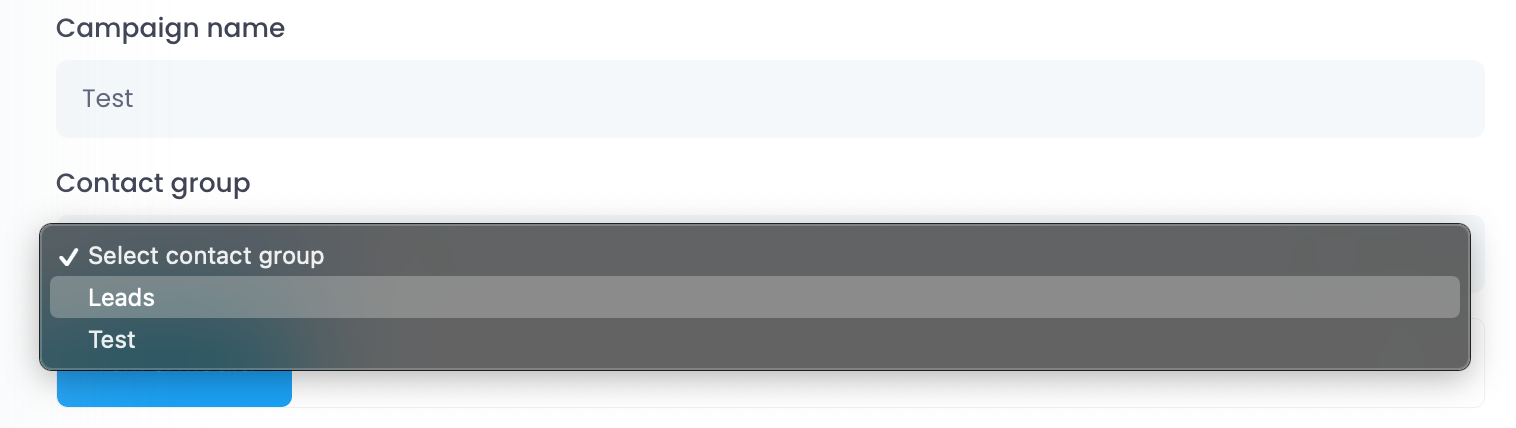
Give your campaign a name.
Select the list of contacts you previously created.
On the Caption box, write the message you wish to send.
Optionally, add an image or video on the Media File section. You can upload it from your computer; import it from Google Drive, One Drive or Dropbox; generate an AI image by clicking on 'Advanced options' or select one from the File Manager.

Now it's time to schedule your bulk campaign! Select a date and a time to start sending the messages.
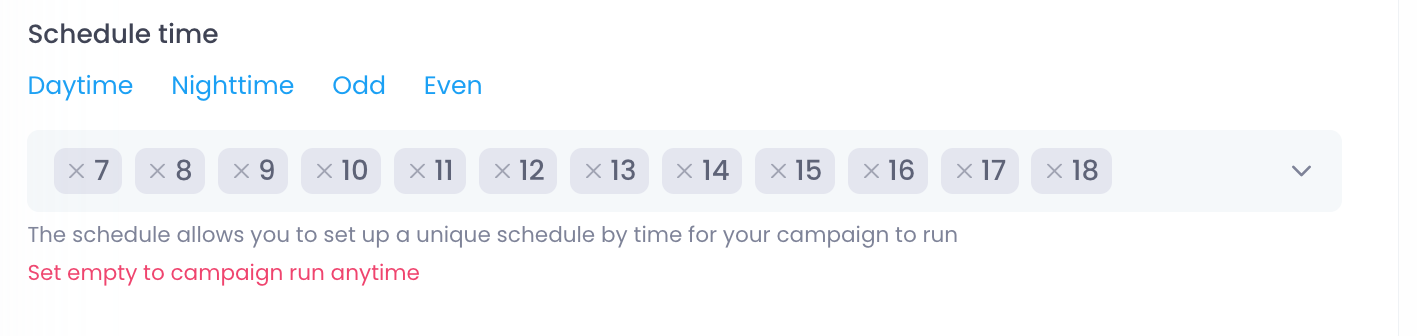
Indicate a minimum and maximum of interval seconds between each message.

Optionally, indicate during which hours must the campaign remain active. Leave this section empty for it to run anytime.
When you are done, click on 'Schedule'.
Did this answer your question?